このチュートリアルでは、MySQL8をUbuntu18.04LTSにインストールするために必要なすべての手順を説明します。他のバージョンのUbuntuでも同じ手順を実行できます。
メモ :この投稿に従うには、インストーラーを使用してインストールされたMySQLサーバーがすでにシステムにインストールされている場合は、それを完全に削除する必要があります。 UbuntuからMySQLを完全に削除する方法に従って、インストーラーを使用して行った以前のインストールを完全に削除できます。
ステップ1-MySQLAPTリポジトリをダウンロードする
MySQL 8以降 Ubuntu 18.04の公式リポジトリには含まれていません 、ダウンロードする必要があります そのDebianパッケージ 。 MySQLの現在の公式に利用可能なバージョン Ubuntu 18.04 は5.7.26 。以下のコマンドを使用して、最新のAPTリポジトリをダウンロードします。
# Download MySQL APT Repository
wget –c https://dev.mysql.com/get/mysql-apt-config_0.8.13-1_all.deb
MySQL8をインストールするための公式Debianパッケージをダウンロードします。
ステップ2-MySQLリポジトリをインストールする
下記のコマンドを使用して、前の手順でダウンロードしたリポジトリを使用してMySQLリポジトリのインストールを開始します。
sudo dpkg -i mysql-apt-config_0.8.13-1_all.deb
図1に示すように、使用可能なオプションから選択するように求められます。デフォルトのオプションを選択したまま、Enterキーを押してインストールを開始します。

図1
次の画面で、インストーラーは、図2に示すように、インストールするMySQLのバージョンを選択するように求めます。 mysql-8を保持します。 選択してEnterキーを押します。
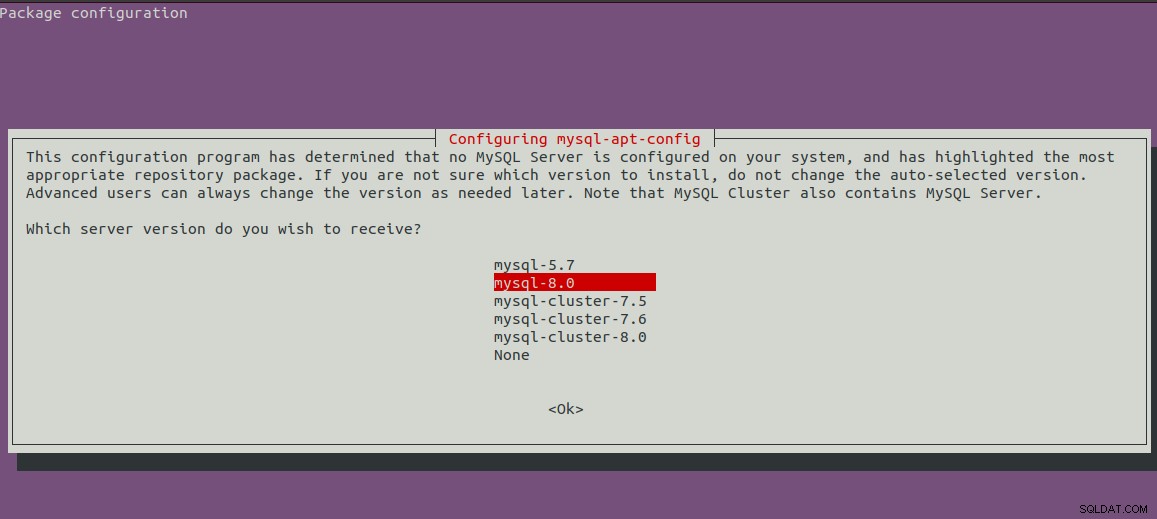
図2
選択したバージョンのMySQLを含む最初の画面が表示されます。次に、下矢印キーと次の矢印キーを押して、図3に示すように[OK]オプションに移動します。
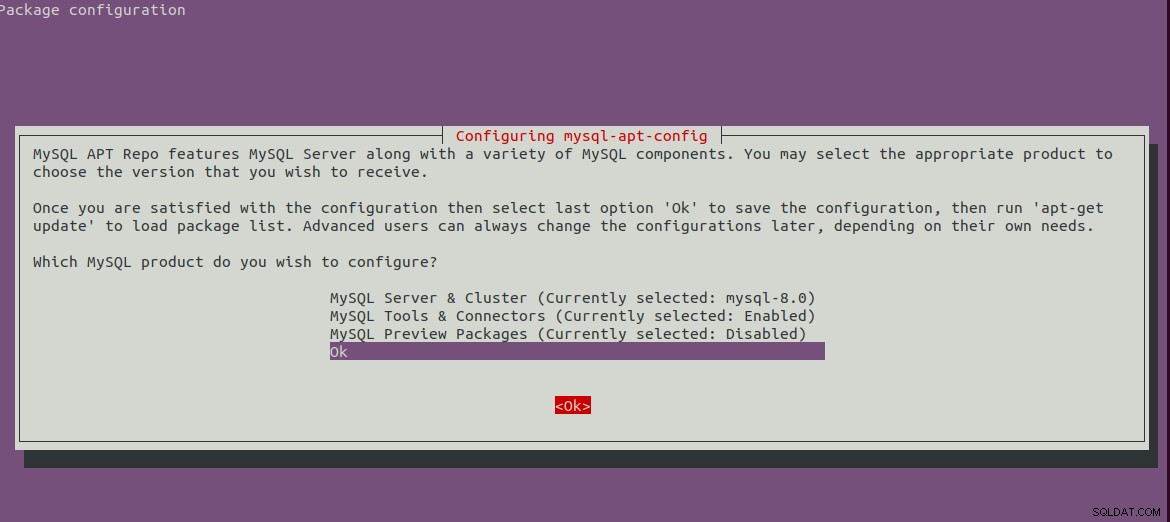
図3
Enterキーを押して、インストールを開始します。インストールが完了すると、以下のメッセージが表示されます。
bravo@pc1:/setups/database$ sudo dpkg -i mysql-apt-config_0.8.13-1_all.deb
Selecting previously unselected package mysql-apt-config.
(Reading database ... 200223 files and directories currently installed.)
Preparing to unpack mysql-apt-config_0.8.13-1_all.deb ...
Unpacking mysql-apt-config (0.8.13-1) ...
Setting up mysql-apt-config (0.8.13-1) ...
Warning: apt-key should not be used in scripts (called from postinst maintainerscript of the package mysql-apt-config)
ステップ3-システムリポジトリを更新する
次に、以下のコマンドを使用してシステムリポジトリを更新します。
sudo apt-get update

# It must show MySQL 8 repos
bravo@pc1:/setups/database$ sudo apt-get update
Hit:1 https://repo.mysql.com/apt/ubuntu bionic InRelease
Hit:2 https://in.archive.ubuntu.com/ubuntu bionic InRelease
Hit:3 https://in.archive.ubuntu.com/ubuntu bionic-updates InRelease
Hit:4 https://in.archive.ubuntu.com/ubuntu bionic-backports InRelease
Hit:5 https://security.ubuntu.com/ubuntu bionic-security InRelease
Get:6 https://repo.mysql.com/apt/ubuntu bionic/mysql-8.0 Sources [962 B]
Get:7 https://repo.mysql.com/apt/ubuntu bionic/mysql-8.0 i386 Packages [7,472 B]
Get:8 https://repo.mysql.com/apt/ubuntu bionic/mysql-8.0 amd64 Packages [7,463 B]
Fetched 15.9 kB in 3s (5,556 B/s)
Reading package lists... Done
システムキャッシュを更新して、利用可能なパッケージの最新バージョンに関する更新を取得します。
ステップ4-MySQLサーバーをインストールする
システムキャッシュを更新した後、以下のコマンドを使用してMySQLサーバーとクライアントのインストールを開始できます。
# Install MySQL Server 8
sudo apt-get install mysql-server mysql-client
Yを押して確認し、インストールを続行します。これにより、Ubuntuリポジトリで利用可能なデフォルトパッケージと同じようにMySQLがインストールされます。インストールでは、
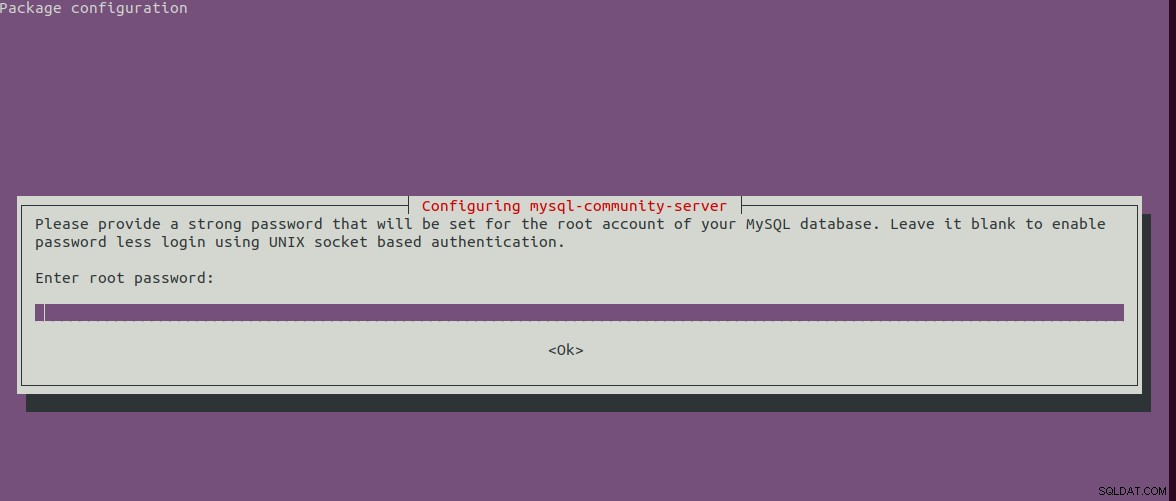
図4
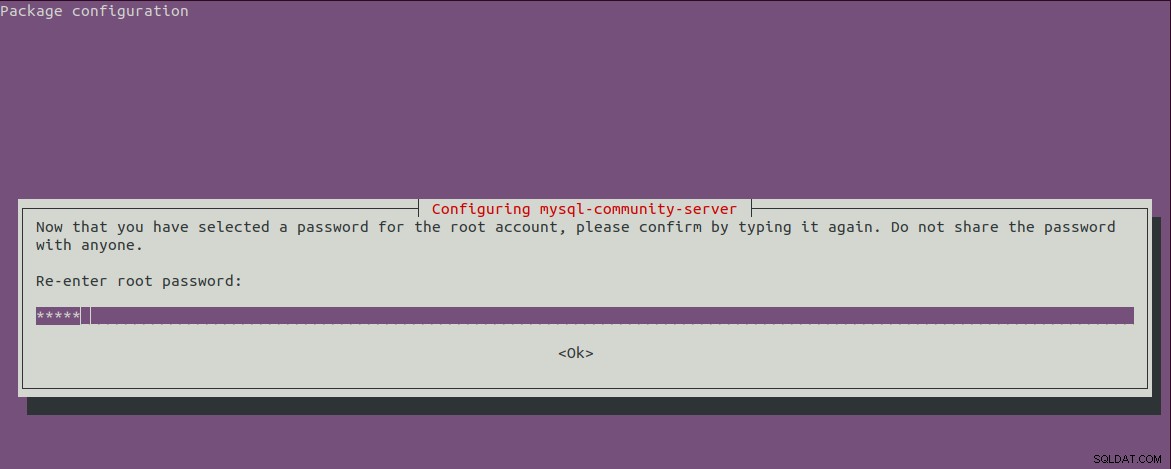
図5
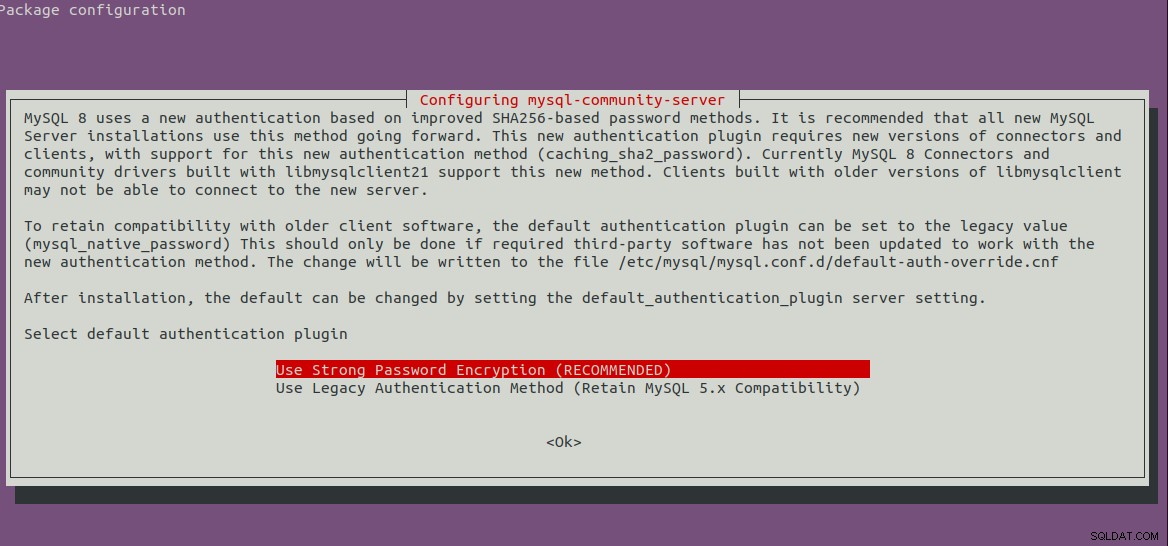
図6
ステップ5-MySQLの安全なインストール
また、以下のコマンドを使用してインストールを保護する必要があります。
sudo mysql_secure_installation
ルートパスワードといくつかのセキュリティの質問を設定するように求められます。私が従った完全な手順は次のとおりです。
bravo@pc1:/setups/database$ sudo mysql_secure_installation

Securing the MySQL server deployment.

Enter password for user root:

VALIDATE PASSWORD COMPONENT can be used to test passwords
and improve security. It checks the strength of password
and allows the users to set only those passwords which are
secure enough. Would you like to setup VALIDATE PASSWORD component?

Press y|Y for Yes, any other key for No: y

There are three levels of password validation policy:

LOW    Length >= 8
MEDIUM Length >= 8, numeric, mixed case, and special characters
STRONG Length >= 8, numeric, mixed case, special characters and dictionary                  file

Please enter 0 = LOW, 1 = MEDIUM and 2 = STRONG: 1
Using existing password for root.

Estimated strength of the password: 25
Change the password for root ? ((Press y|Y for Yes, any other key for No) : n

 ... skipping.
By default, a MySQL installation has an anonymous user,
allowing anyone to log into MySQL without having to have
a user account created for them. This is intended only for
testing, and to make the installation go a bit smoother.
You should remove them before moving into a production
environment.

Remove anonymous users? (Press y|Y for Yes, any other key for No) : y
Success.


Normally, root should only be allowed to connect from
'localhost'. This ensures that someone cannot guess at
the root password from the network.

Disallow root login remotely? (Press y|Y for Yes, any other key for No) : y
Success.

By default, MySQL comes with a database named 'test' that
anyone can access. This is also intended only for testing,
and should be removed before moving into a production
environment.


Remove test database and access to it? (Press y|Y for Yes, any other key for No) : y
 - Dropping test database...
Success.

 - Removing privileges on test database...
Success.

Reloading the privilege tables will ensure that all changes
made so far will take effect immediately.

Reload privilege tables now? (Press y|Y for Yes, any other key for No) : y
Success.

All done!
bravo@pc1:/setups/database$
上記の手順により、テストデータベースと匿名ユーザーが削除されます。また、リモートログインを禁止して、 127.0.0.1を使用してサーバーにローカルでアクセスできるようにします。 またはlocalhost 。
以下のコマンドを使用して、MySQLサーバーが実行されているかどうかを確認します。
bravo@pc1:/setups/database$ systemctl status mysql
● mysql.service - MySQL Community Server
   Loaded: loaded (/lib/systemd/system/mysql.service; enabled; vendor preset: enabled)
   Active: active (running) since Thu 2019-08-15 10:40:47 IST; 4min 45s ago
     Docs: man:mysqld(8)
           https://dev.mysql.com/doc/refman/en/using-systemd.html
  Process: 28669 ExecStartPre=/usr/share/mysql-8.0/mysql-systemd-start pre (code=exited, status=0/SUCCESS)
 Main PID: 28708 (mysqld)
   Status: "Server is operational"
    Tasks: 38 (limit: 4915)
   CGroup: /system.slice/mysql.service
           └─28708 /usr/sbin/mysqld

Aug 15 10:40:45 bravo systemd[1]: Starting MySQL Community Server...
Aug 15 10:40:47 bravo systemd[1]: Started MySQL Community Server.
ステップ6-バージョンとアクセスを確認する
当社がインストールしたサーバーのバージョンを確認し、当社が構成したルートパスワードを使用してサーバーにアクセスできることも確認してください。
# Check version
sudo mysql --version
mysql  Ver 8.0.17 for Linux on x86_64 (MySQL Community Server - GPL)

# Login
sudo mysql -u root -p
ステップ7-重要なコマンド
このセクションでは、サーバーを起動、停止、および再起動するための重要なコマンドのいくつかを示します。
# Check server status
sudo service mysql status

# Stop server
sudo service mysql stop

# Start server
sudo service mysql start

# Restart server
sudo service mysql restart
ステップ8-パスワードプラグインの使用
バージョン5.7でバックワードの互換性のためにパスワードプラグインオプションを使用することを選択した場合、
# Login to MySQL

# Check password plugin of root user
SELECT user,authentication_string,plugin,host FROM mysql.user;

# Note the password plugin of root user
+------------------+-------------------------------------------+-----------------------+-----------+
| user             | authentication_string                     | plugin                | host      |
+------------------+-------------------------------------------+-----------------------+-----------+
| root             |                                           | auth_socket           | localhost |
+------------------+-------------------------------------------+-----------------------+-----------+

# Change password plugin of root user to native
ALTER USER 'root'@'localhost' IDENTIFIED WITH mysql_native_password BY '<pw>';

# Apply changes
flush privileges;

# Check password scheme of user
SELECT user,authentication_string,plugin,host FROM mysql.user;

# Note the password plugin of root user
+------------------+-------------------------------------------+-----------------------+-----------+
| user             | authentication_string                     | plugin                | host      |
+------------------+-------------------------------------------+-----------------------+-----------+
| root             | *E5C4F73D963132CEF9BB4PA79LA818C08BAQC300 | mysql_native_password | localhost |
+------------------+-------------------------------------------+-----------------------+-----------+

# Change to new and recommended password plugin
ALTER USER 'root'@'localhost' IDENTIFIED WITH caching_sha2_password BY '<pw>';

# Apply changes
flush privileges;

# Check password scheme of user
SELECT user,authentication_string,plugin,host FROM mysql.user;

+------------------+------------------------------------------------------------------------+-----------------------+-----------+
| user             | authentication_string                                                  | plugin                | host      |
+------------------+------------------------------------------------------------------------+-----------------------+-----------+
| root             | $A$005$THISISACOMBINATIONOFINVALIDSALTANDPASSWORDTHATMUSTNEVERBRBEUSED | caching_sha2_password | localhost |
+------------------+------------------------------------------------------------------------+-----------------------+-----------+
これが、MySQLサーバーの最新バージョン(Ubuntu 18.04LTSにMySQL8)をインストールする方法です。
