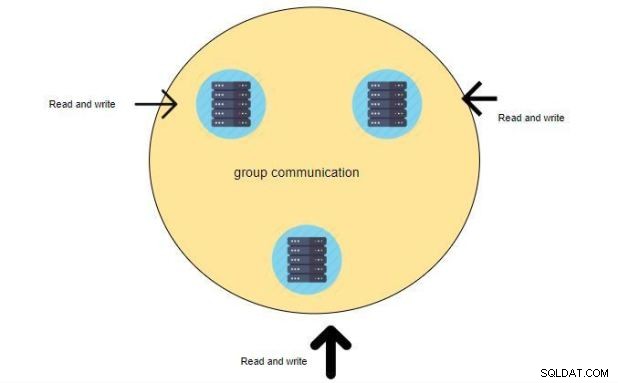
別のブログへようこそ。今回は、perconaXtraDBクラスターのセットアップ方法を紹介します。では、percona XtraDBとは何ですか? XtraDBはMySQLクラスタリングソリューションであり、高可用性を確保し、ダウンタイムとデータ損失を防ぎ、成長する環境に線形のスケーラビリティを提供します。クエリを実行すると、ノード上でローカルに実行されます。すべてのデータはローカルで利用可能であり、リモートアクセスは必要ありません。読み取りワークロードをスケーリングするための優れたソリューション。任意のノードに読み取りクエリを配置できます。 percona XtraDBをインストールすると、MySQLを個別にインストールする必要はありません。XtraDBはperconaリポジトリからそれを取得し、この記事を読んだ後、クラスターを準備できるようになります。
前提条件:
LinuxサーバーでperconaXtraDBクラスターを構成するには、3台のサーバーが必要です。情報は次のようになります。
サーバーpercona1:192.168.56.110
サーバーpercona2:192.168.56.113
サーバーpercona3:192.168.56.114
OS:CentOS 7
2台のサーバーを使用することもできますが、公式ドキュメントでは奇数台のサーバーを推奨しています。例:3、5、7など。偶数のノードには行かないでください。彼らはそれをスプリットブレインと呼んでいます。スプリットブレインとは、ノードが相互に接続できなくなった後、両方が共有リソースを制御しようとするか、クラスターサービスを同時に提供しようとする状態です。
注:Percona XtraDBクラスターをインストールするノードにrootアクセスが必要です
(root権限を持つユーザーとしてログインするか、Sudoでコマンドを実行できる
事前チェック:
/ etc / hostsファイルに以下のエントリを追加します->すべてのサーバー(percona1、percona2、percona3)
192.168.56.110 percona1.localdomain percona1
192.168.56.113 percona2.localdomain percona2
192.168.56.114 percona3.localdomain percona3
ファイアウォールポートを開く:
すべてのサーバー(percona1、percona2、percona3)の以下のポートを開く必要があります
3306
4444
4567
4568
firewall-cmd --zone=public --add-service=mysql --permanent
firewall-cmd --zone=public --add-port=3306/tcp --permanent
firewall-cmd --zone=public --add-port=4567/tcp --permanent
firewall-cmd --zone=public --add-port=4568/tcp --permanent
firewall-cmd --zone=public --add-port=4444/tcp --permanent
firewall-cmd --zone=public --add-port=4567/udp --permanent
firewall-cmd --reload
firewall-cmd --list-all
[example@sqldat.com ~]# firewall-cmd --list-all
public (active)
target: default
icmp-block-inversion: no
interfaces: enp0s3 enp0s8
sources:
services: ssh dhcpv6-client mysql
ports: 3306/tcp 4567/tcp 4568/tcp 4444/tcp 4567/udp
protocols:
masquerade: no
forward-ports:
source-ports:
icmp-blocks:
rich rules
SELinuxを無効にする:——->すべてのサーバー(percona1、percona2、percona3)
[example@sqldat.com ~]# setenforce 0
これにより、SELinuxは現在のセッションで許可モードになりますが、永続的に無効にする必要があります。
/ etc / sysconfig / selinuxファイルを編集してselinux変数をすべてのサーバー(percona1、percona2、percona3)で無効に設定します:
vi / etc / sysconfig / selinux
SELINUX =disable
各サーバーにpingを送信してアクセス可能性を確認するには、すべてのサーバーが相互にアクセス可能である必要があります。
前提条件RPMを下回るインストール:——->すべてのサーバー(percona1、percona2、percona3)
epel-release
libev
socat
[example@sqldat.com ~]# yum -y install epel-release
Installed:
epel-release.noarch 0:7-11

[example@sqldat.com yum.repos.d]# yum -y install libev
Installed:
libev.x86_64 0:4.15-7.el7

[example@sqldat.com Desktop]# yum -y install socat
Installed:
socat.x86_64 0:1.7.3.2-2.el7
Perconaリポジトリを追加します:——->すべてのサーバー(percona1、percona2、percona3)
次に、3つのサーバー(percona1、percona2、percona3)すべてにperconaリポジトリを追加します。
[example@sqldat.com ~]# sudo yum -y install https://repo.percona.com/yum/percona-release-latest.noarch.rpm
Installed:
percona-release.noarch 0:1.0-13
Complete!
Percona-XtraDB-Clusterをインストールします:——->すべてのサーバー(percona1、percona2、percona3)
[example@sqldat.com ~]# yum install -y Percona-XtraDB-Cluster-57
Loaded plugins: fastestmirror, langpacks
Loading mirror speeds from cached hostfile
.
.
.

Installed:
Percona-XtraDB-Cluster-57.x86_64 0:5.7.27-31.39.1.el7 Percona-XtraDB-Cluster-shared-57.x86_64 0:5.7.27-31.39.1.el7
Percona-XtraDB-Cluster-shared-compat-57.x86_64 0:5.7.27-31.39.1.el7

Dependency Installed:
Percona-XtraDB-Cluster-client-57.x86_64 0:5.7.27-31.39.1.el7 Percona-XtraDB-Cluster-server-57.x86_64 0:5.7.27-31.39.1.el7
percona-xtrabackup-24.x86_64 0:2.4.17-1.el7 perl-DBD-MySQL.x86_64 0:4.023-6.el7
perl-Digest.noarch 0:1.17-245.el7 perl-Digest-MD5.x86_64 0:2.52-3.el7
qpress.x86_64 0:11-1.el7

Replaced:
mariadb-libs.x86_64 1:5.5.60-1.el7_5
Complete!
PerconaXtraDBがインストールされているかどうかを確認してみましょう。
[example@sqldat.com ~]# yum search Percona-XtraDB

NOTE: Till here all above steps should be perfomed on all servers (percona1,percona2,percona3)
書き込みセットレプリケーション用のノードの構成
ON Percona1:
MySQLサーバーを起動し、percona1サーバーでのみrootパスワードを変更しましょう
[example@sqldat.com ~]# systemctl start mysql
[example@sqldat.com ~]# grep password /var/log/mysqld.log
2019-12-11T10:35:12.135133Z 1 [Note] A temporary password is generated for example@sqldat.com: hJ(l8ySe>f>E

Note : copy the password "hJ(l8ySe>f>E" we are going to change this password :

[example@sqldat.com ~]# mysql_secure_installation ------->on all server(percona1,percona2,percona3)

Securing the MySQL server deployment.
Enter password for user root:

The existing password for the user account root has expired. Please set a new password.

New password:

Re-enter new password:

VALIDATE PASSWORD PLUGIN can be used to test passwords
and improve security. It checks the strength of password
and allows the users to set only those passwords which are
secure enough. Would you like to setup VALIDATE PASSWORD plugin?

Press y|Y for Yes, any other key for No:
Using existing password for root.
Change the password for root ? ((Press y|Y for Yes, any other key for No) :

... skipping.
By default, a MySQL installation has an anonymous user,
allowing anyone to log into MySQL without having to have
a user account created for them. This is intended only for
testing, and to make the installation go a bit smoother.
You should remove them before moving into a production
environment.

Remove anonymous users? (Press y|Y for Yes, any other key for No) : yes
Success.

Normally, root should only be allowed to connect from
'localhost'. This ensures that someone cannot guess at
the root password from the network.

Disallow root login remotely? (Press y|Y for Yes, any other key for No) : yes
Success.

By default, MySQL comes with a database named 'test' that
anyone can access. This is also intended only for testing,
and should be removed before moving into a production
environment.

Remove test database and access to it? (Press y|Y for Yes, any other key for No) :

... skipping.
Reloading the privilege tables will ensure that all changes
made so far will take effect immediately.

Reload privilege tables now? (Press y|Y for Yes, any other key for No) : yes
Success.

All done!
次に、percona1でMySQLサーバーを停止します。
[example@sqldat.com ~]# systemctl stop mysql
次に、レプリケーションを構成し、my.cnfファイルにレプリケーション情報を追加します。
percona1でレプリケーション設定を構成する:
cat >>/etc/my.cnf<<EOF
[mysqld]
wsrep_provider=/usr/lib64/galera3/libgalera_smm.so
wsrep_cluster_name=perconacluster
wsrep_cluster_address=gcomm://192.168.56.110,192.168.56.113,192.168.56.114
wsrep_node_name=percona1
wsrep_node_address=192.168.56.110
wsrep_sst_method=xtrabackup-v2
wsrep_sst_auth=perconarep:perconapasswd
pxc_strict_mode=ENFORCING
binlog_format=ROW
default_storage_engine=InnoDB
innodb_autoinc_lock_mode=2
EOF
次に、最初のノードをブートストラップしてクラスターを初期化します。これは、メインデータベースのあるノードである必要があります。このノードは、クラスターのデータソースとして使用されます。この場合はpercona1サーバーです
[example@sqldat.com ~]# systemctl start example@sqldat.com

Before configuring replication we need to create a separate user for replication which will be used for the replication process. why we need replication user? when you add a new node to the cluster it dumps the current node configuration and transfers it to the second node for that reason we need a separate user.
注: ユーザーが変数“ wsrep_sst_auth”に対して同じように言及されていることを確認してください my.cnfファイルで使用されているレプリケーション構成で。
[example@sqldat.com ~]#mysql -u root -p
mysql>create user example@sqldat.com'%' identified by 'perconapasswd';
mysql>grant all on *.* to example@sqldat.com'%';
mysql>flush privileges;
オンPercona2:
percona2でレプリケーション設定を構成します:
cat >>/etc/my.cnf<<EOF
[mysqld]
wsrep_provider=/usr/lib64/galera3/libgalera_smm.so
wsrep_cluster_name=perconacluster
wsrep_cluster_address=gcomm://192.168.56.110,192.168.56.113,192.168.56.114
wsrep_node_name=percona2
wsrep_node_address=192.168.56.113
wsrep_sst_method=xtrabackup-v2
wsrep_sst_auth=perconarep:perconapasswd
pxc_strict_mode=ENFORCING
binlog_format=ROW
default_storage_engine=InnoDB
innodb_autoinc_lock_mode=2
EOF
ここでmysqlを起動すると、このノードがクラスターに追加されます。
[example@sqldat.com ~]# systemctl start mysql
オンPercona3:
percona3でレプリケーション設定を構成します:
cat >>/etc/my.cnf<<EOF
[mysqld]
wsrep_provider=/usr/lib64/galera3/libgalera_smm.so
wsrep_cluster_name=perconacluster
wsrep_cluster_address=gcomm://192.168.56.110,192.168.56.113,192.168.56.114
wsrep_node_name=percona3
wsrep_node_address=192.168.56.114
wsrep_sst_method=xtrabackup-v2
wsrep_sst_auth=perconarep:perconapasswd
pxc_strict_mode=ENFORCING
binlog_format=ROW
default_storage_engine=InnoDB
innodb_autoinc_lock_mode=2
EOF
ここでmysqlを起動すると、このノードがクラスターに追加されます。
[example@sqldat.com ~]# systemctl start mysql
mysqlログ(var / log / mysqld.log)でそのようなメッセージを監視します
(percona2):0.0(percona1)からの状態転送が完了しました
1.0(percona3):0.0(percona1)からの状態転送が完了しました
クラスタが初期化されていることを確認するには、次のコマンドを実行します。
mysql> show status like 'wsrep%';
+----------------------------------+-------------------------------------------------------------+
| Variable_name | Value |
+----------------------------------+-------------------------------------------------------------+
| wsrep_local_state_uuid | 6d95cd36-1c1a-11ea-999a-83631204f6e3 |
| wsrep_protocol_version | 9 |
| wsrep_last_applied | 6 |
.
.
.
| wsrep_flow_control_recv | 0 |
| wsrep_flow_control_interval | [ 173, 173 ] |
| wsrep_flow_control_interval_low | 173 |
| wsrep_flow_control_interval_high | 173 |
| wsrep_flow_control_status | OFF |
.
.
| wsrep_local_state | 4 |
| wsrep_local_state_comment | Synced |
| wsrep_cert_index_size | 1 |
| wsrep_cert_bucket_count | 22 |
| wsrep_gcache_pool_size | 2384 |
.
.
| wsrep_incoming_addresses | 192.168.56.110:3306,192.168.56.114:3306,192.168.56.113:3306 |
| wsrep_cluster_weight | 3 |
| wsrep_desync_count | 0 |
| wsrep_evs_delayed | |
| wsrep_evs_evict_list | |
| wsrep_evs_repl_latency | 0/0/0/0/0 |
| wsrep_evs_state | OPERATIONAL |
| wsrep_gcomm_uuid | 1d16f574-1c1b-11ea-b5dd-574c9a653584 |
| wsrep_cluster_conf_id | 3 |
| wsrep_cluster_size | 3 |
| wsrep_cluster_state_uuid | 6d95cd36-1c1a-11ea-999a-83631204f6e3 |
| wsrep_cluster_status | Primary |
| wsrep_connected | ON |
| wsrep_local_bf_aborts | 0 |
| wsrep_local_index | 0 |
| wsrep_provider_name | Galera |
| wsrep_provider_vendor | Codership Oy <example@sqldat.com> |
| wsrep_provider_version | 3.39(rb3295e6) |
| wsrep_ready | ON |
+----------------------------------+-------------------------------------------------------------+
71 rows in set (0.00 sec)
ご覧のとおり、クラスターサイズは3 “ wsrep_cluster_size | 3インチ また、3つのノードのIPも確認できます
wsrep_incoming_addresses | 192.168.56.110:3306,192.168.56.114:3306,192.168.56.113:3306
クラスターをテストします:
percona 1でデータベースを作成してから、percoan3が複製されていることを確認します。
mysql> show databases;
+--------------------+
| Database |
+--------------------+
| information_schema |
| mysql |
| performance_schema |
| sys |
+--------------------+
4 rows in set (0.03 sec)
mysql> CREATE DATABASE perconatest;
Query OK, 1 row affected (0.03 sec)
次に、percona3を確認して、「perconatest」DBが作成されることを確認します
[example@sqldat.com ~]# mysql -uroot -p -e "show databases"
Enter password:
+--------------------+
| Database |
+--------------------+
| information_schema |
| mysql |
| perconatest |
| performance_schema |
| sys |
+--------------------+