最初のステップでは、getcliを使用して基本的なプロジェクト構造を生成します
https://pub.dev/packages/get_cli
get create project:strapi_flutter_internation_poc
  1) Flutter Project
  2) Get Server
1
? What is your company's domain?  Example: com.yourcompany  com.nasawz.strapi_flutter_internation_poc

what language do you want to use on ios?

  1) Swift
  2) Objective-C
1

what language do you want to use on android?

  1) Kotlin
  2) Java
1

Do you want to use null safe?

  1) Yes!
  2) No
1

do you want to use some linter?

  1) no
  2) Pedantic [Deprecated]
  3) Effective Dart [Deprecated]
  4) Dart Recommended
1

Running `flutter create D:\poc\strapi_flutter_internation_poc` …

$ flutter create --no-pub -i swift -a kotlin --org com.nasawz.strapi_flutter_internation_poc D:\poc\strapi_flutter_internation_poc
Creating project ....
  lib\main.dart (created)
  pubspec.yaml (created)
  README.md (created)
  test\widget_test.dart (created)
  .gitignore (created)
  .idea\libraries\Dart_SDK.xml (created)
  .idea\libraries\KotlinJavaRuntime.xml (created)
  .idea\modules.xml (created)
  .idea\runConfigurations\main_dart.xml (created)
  .idea\workspace.xml (created)
  .metadata (created)
 .......
 ........
Wrote 81 files.

All done!
In order to run your application, type:

  $ cd .
  $ flutter run

Your application code is in .\lib\main.dart.


Running `flutter pub get` …

$ flutter pub get
Running "flutter pub get" in strapi_flutter_internation_poc...      2,666ms
$ dart migrate --apply-changes --skip-import-check
Migrating D:\poc\strapi_flutter_internation_poc

See https://dart.dev/go/null-safety-migration for a migration guide.

Analyzing project...
All sources appear to be already migrated.  Nothing to do.
✓  File: analysis_options.yaml created successfully at path: analysis_options.yaml
  1) GetX Pattern (by Kauê)
  2) CLEAN (by Arktekko)
1

Your lib folder is not empty. Are you sure you want to overwrite your application?
 WARNING: This action is irreversible

  1) Yes!
  2) No
1
✓  'Package: get installed!
✓  File: main.dart created successfully at path: lib\\main.dart
✓  File: home_controller.dart created successfully at path: ./lib\app\modules\home\\controllers\\home_controller.dart
✓  File: home_view.dart created successfully at path: ./lib\app\modules\home\\views\\home_view.dart
✓  File: home_binding.dart created successfully at path: ./lib\app\modules\home\\bindings\\home_binding.dart
✓  File: app_routes.dart created successfully at path: lib\\app\\routes\\app_routes.dart
✓  File: app_pages.dart created successfully at path: lib\\app\\routes\\app_pages.dart
✓  home route created successfully.
✓  Home page created successfully.
✓  GetX Pattern structure successfully generated.

Running `flutter pub get` …

$ flutter pub get
Running "flutter pub get" in strapi_flutter_internation_poc...
これまでのところ、Flutterベースのプロジェクト構造があります。
次に、Strapiをプロジェクトに組み込みましょう。
ステップ2、Strapiに統合
https://strapi.io/
プロジェクトディレクトリに入る
cd .\strapi_flutter_internation_poc
「create-strapi-app」を使用してプロジェクトを初期化します
npx create-strapi-app strapi
npx: installed 146 in 14.856s
? Choose your installation type Quickstart (recommended)
? Would you like to use a template? (Templates are Strapi configurations designed for a specific use case) No
Creating a quickstart project.
Creating a new Strapi application at D:\poc\strapi_flutter_internation_poc\strapi.
Creating files.
Dependencies installed successfully.

Your application was created at D:\poc\strapi_flutter_internation_poc\strapi.

Available commands in your project:

  yarn develop
  Start Strapi in watch mode.

  yarn start
  Start Strapi without watch mode.

  yarn build
  Build Strapi admin panel.

  yarn strapi
  Display all available commands.

You can start by doing:

  cd D:\poc\strapi_flutter_internation_poc\strapi
  yarn develop


> [email protected] build D:\poc\strapi_flutter_internation_poc\strapi
> strapi build "--no-optimization"

Building your admin UI with development configuration ...

√ Webpack
  Compiled successfully in 27.43s

Running your Strapi application.
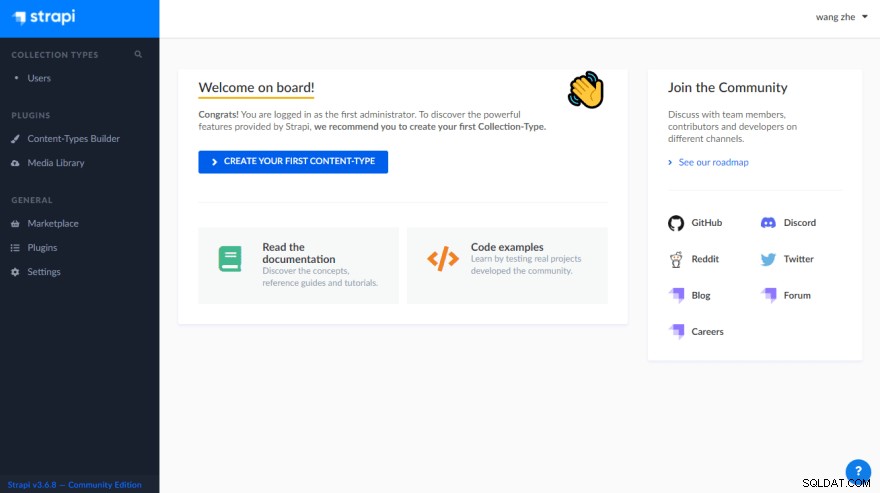
ここで、Strapiは正常にインストールされ、ローカルで開始されますhttp:// localhost:1337

このインターフェイスが表示されたら、最初に一時停止して、最初にStrapiの構成を変更できます。ストラップのデフォルトのSqliteデータベースのアドレスをFlutterプロジェクトのアセットフォルダーにポイントします。
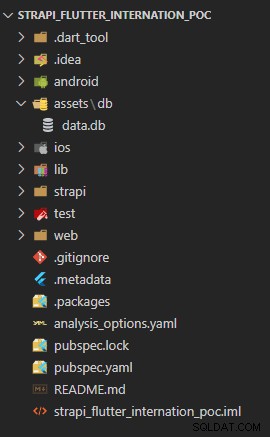
まず、対応するフォルダassets/dbを作成します
[project_root]/strapi/config/database.jsを編集します
module.exports = ({ env }) => ({
  defaultConnection: 'default',
  connections: {
    default: {
      connector: 'bookshelf',
      settings: {
        client: 'sqlite',
        filename: env('DATABASE_FILENAME', '../assets/db/data.db'),
      },
      options: {
        useNullAsDefault: true,
      },
    },
  },
});
変更が完了したら、Strapiプロジェクトを再起動します
npm run develop
管理者アカウントを登録する
[email protected]
nrVABVAAYq9geTY

構成ファイルpubspec.yamlを変更します Flutterプロジェクトの
flutter:
  assets:
    - assets/db/
  uses-material-design: true
その後の開発では、FlutterはStrapiのデータベースファイルを使用できます。
次に、以下に示すプロジェクト構造を確認します


