次に、これらのリストビューで選択された値を新しいUpdateActityで取得して、編集または削除できるようにします。その方法。
これは、更新(UpdateActivityに移動)および削除(アイテムのロングクリック)の実例です。これは、CursorAdapter、つまりストックSimpleCursorAdapterを使用します。 SQLiteデータにカーソルアダプタを使用するのは非常に簡単です。
まず、 DatabaseHelper :-
class DatabaseHelper extends SQLiteOpenHelper {
    public DatabaseHelper(@Nullable Context context) {
        super(context, "mydatabase", null, 1);
    }

    @Override
    public void onCreate(SQLiteDatabase sqLiteDatabase) {
        sqLiteDatabase.execSQL("CREATE TABLE IF NOT EXISTS mytable (_id INTEGER PRIMARY KEY, name TEXT, surname TEXT, phone TEXT)");
        /* Add some test data */
        add("Fred","Bloggs","0000000000",sqLiteDatabase);
        add("Jane","Doe","1111111111",sqLiteDatabase);
        add("Mary","Johnston","2222222222",sqLiteDatabase);
        add("Tom","cobboly","3333333333",sqLiteDatabase);
        add("Anne","Walker","4444444444",sqLiteDatabase);

    }

    @Override
    public void onUpgrade(SQLiteDatabase sqLiteDatabase, int i, int i1) {

    }

    public long update(long id, String name, String surname, String phone) {
        long rv = 0;
        ContentValues cv = new ContentValues();
        if (name != null && name.length() > 0) cv.put("name",name);
        if (surname != null && surname.length() > 0) cv.put("surname",surname);
        if (phone != null && phone.length() > 0) cv.put("phone",phone);
        if (cv.size() > 0) rv = this.getWritableDatabase().update("mytable",cv,"_id=?",new String[]{String.valueOf(id)});
        return rv;
    }

    public long delete(long id) {
        return this.getWritableDatabase().delete("mytable","_id=?",new String[]{String.valueOf(id)});
    }

    public Cursor getAll() {
        return this.getWritableDatabase().query("mytable",null,null,null,null,null,null);
    }

    public Cursor getById(long id) {
        return this.getWritableDatabase().query("mytable",null,"_id=?",new String[]{String.valueOf(id)},null,null,null);
    }

    private long add(String name, String surname, String phone, SQLiteDatabase db) {
        ContentValues cv = new ContentValues();
        cv.put("name",name);
        cv.put("surname",surname);
        cv.put("phone",phone);
        return db.insert("mytable",null,cv);
    }

    public long add(String name, String surname, String phone) {
        return add(name,surname,phone,this.getWritableDatabase());
    }
}
- 重要な注意事項 カーソルアダプタにはid列が必要であり、その名前は _idです。 。
- 注 これにより、いくつかのテストデータが追加されます。
- すべてのアクセス方法が含まれています
- getAllは、テーブルのすべての行を含むカーソルを返します。
- 渡された値に従って更新を更新します。これは、値の更新のみに対応します(たとえば、editSurname EditTextがないため、nullが渡されるため、名前はそのままになります)。
- getByIdは、IDに応じたすべての値を持つカーソルを返します
- 4番目のパラメーターを使用しない追加は一般的な追加であり、4番目のパラメーターを使用する追加は、DatabaaeHelperが完全にインスタンス化される前にonCreateで使用できるようにするためのものです。
ListDataActivity
public class ListDataActivity extends AppCompatActivity {

    ListView listview;
    SimpleCursorAdapter sca;
    DatabaseHelper databaseHelper;
    Cursor cursor;

    @Override
    protected void onCreate(Bundle savedInstanceState) {
        super.onCreate(savedInstanceState);
        setContentView(R.layout.activity_main);
        listview = this.findViewById(R.id.mylistview);
        databaseHelper = new DatabaseHelper(this);
        setOrRefreshListView();
    }

    /* handles the ListView */
    private void setOrRefreshListView() {
        cursor = databaseHelper.getAll(); /* Gets the data to be listed */
        /* If first time then setup the adapter listeners etc */
        if (sca == null) {
            sca = new SimpleCursorAdapter(
                    this,
                    android.R.layout.simple_expandable_list_item_2,
                    cursor,
                    new String[]{"name","phone"},
                    new int[]{android.R.id.text1, android.R.id.text2},
                    0
            );
            listview.setAdapter(sca); // attach the adapter to the listview
            // setup On Item Click to start the update activity passing the id
            listview.setOnItemClickListener(new AdapterView.OnItemClickListener() {
                @Override
                public void onItemClick(AdapterView<?> adapterView, View view, int i, long l) {
                    Intent intent = new Intent(ListDataActivity.this,UpdateActivity.class);
                    intent.putExtra("my_id_extra",l);
                    startActivity(intent);
                }
            });
            // setup the on Item LONG Click to delete a row
            listview.setOnItemLongClickListener(new AdapterView.OnItemLongClickListener() {
                @Override
                public boolean onItemLongClick(AdapterView<?> adapterView, View view, int i, long l) {
                    databaseHelper.delete(l);
                    setOrRefreshListView(); // after deletion refresh the data
                    return true;
                }
            });
        } else {
            sca.swapCursor(cursor); // if not the first time just tell the adapter the data has changed
        }
    }

    @Override
    protected void onResume() {
        super.onResume();
        setOrRefreshListView(); // refresh the listview when returning to the activity
    }

    @Override
    protected void onDestroy() {
        super.onDestroy();
        cursor.close(); // clean up
    }
}
ListDataActivityのレイアウト(非常に基本的なのはListViewだけです):-
<?xml version="1.0" encoding="utf-8"?>
<LinearLayout xmlns:android="https://schemas.android.com/apk/res/android"
    xmlns:tools="https://schemas.android.com/tools"
    android:orientation="vertical"
    android:layout_width="match_parent"
    android:layout_height="match_parent"
    tools:context=".ListDataActivity">

    <TextView
        android:layout_width="wrap_content"
        android:layout_height="wrap_content"
        android:text="Hello World!" />

    <ListView
        android:id="@+id/mylistview"
        android:layout_width="match_parent"
        android:layout_height="wrap_content"
        android:background="@color/teal_200"
        >
    </ListView>

</LinearLayout>
- 背景が設定されているため、ListViewが見やすくなっています。
UpdateActivity :-
public class UpdateActivity extends AppCompatActivity {

    DatabaseHelper databaseHelper;
    EditText editName, editPhone;
    Button saveButtonId,showButtonId;
    long currentId;

    @Override
    protected void onCreate(Bundle savedInstanceState) {
        super.onCreate(savedInstanceState);
        setContentView(R.layout.activity_update);
        editName = this.findViewById(R.id.editName);
        editPhone = this.findViewById(R.id.editPhone);
        saveButtonId = this.findViewById(R.id.savebuttonId);
        showButtonId = this.findViewById(R.id.showbuttonId);
        databaseHelper = new DatabaseHelper(this);
        currentId =  this.getIntent().getLongExtra("my_id_extra",-1);
        if (currentId < 0 ) {
            // do something as invalid id passed
            finish();
        }
        showData();
        showButtonId.setOnClickListener(new View.OnClickListener() {
            @Override
            public void onClick(View view) {
                finish();
            }
        });
        saveButtonId.setOnClickListener(new View.OnClickListener() {
            @Override
            public void onClick(View view) {
                databaseHelper.update(currentId,editName.getText().toString(),null,editPhone.getText().toString());
            }
        });
    }

    private void showData() {
        Cursor cursor = databaseHelper.getById(currentId);
        if (cursor.moveToFirst()) {
            editName.setText(cursor.getString(cursor.getColumnIndex("name")));
            editPhone.setText(cursor.getString(cursor.getColumnIndex("phone")));
        }
        cursor.close();
    }
}
- showDataボタンがListDataActivityに戻ります(これがあなたの望みだと思います)。
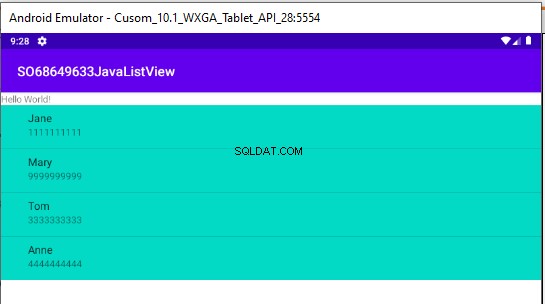
結果 :-
- 新しく開始したとき:-
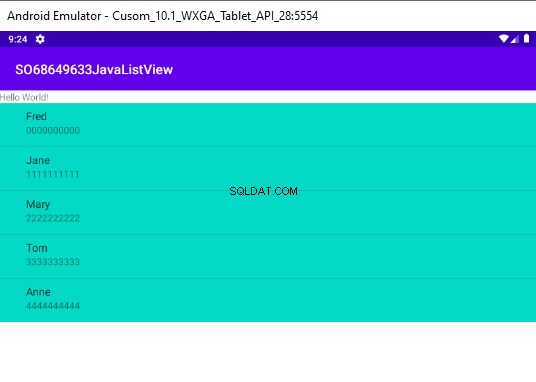
-
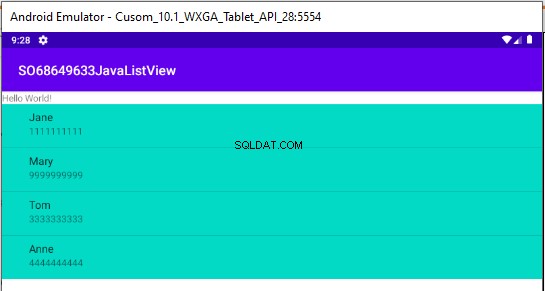
メアリーをクリックします(そして番号を999999999に編集しますが、保存しません):-
-
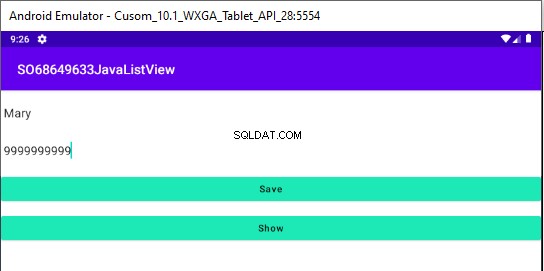
[保存]をクリックします(2と同じ)
-
[表示]をクリックします:-
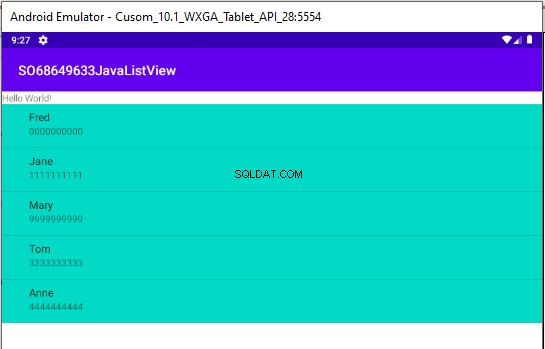
- フレッドをロングクリック:-
- アプリを再起動します:-